No products in the cart.
How to Frame a Plastic Mould
Here is a simple and easy way to frame a plastic paving slab mould, by framing or making a carrier for your mould, it will give your mould more strength, increase the life span of the mould, it will also help to give your mould an even cast, as well as making it easier to stack all of your moulds and will also allow the air to circulate around each mould allowing it to dry out faster.
There are many commercial mould release oils on the market such as Caltex Mould Release Oil 20, SafeStrip or similar products that are available through hardware/DIY Stores. Or you may wish to use a general cooking-type spray oil, caster oil or other mineral-based oils are often used with methylated spirits to “thin-down” and reduce costs.
A handy hint: To save money on timber, try using old shipping pallets that can be taken apart and reused for framing, this type of timber is usually a rough sawn wood and is ideal for framing.
Step 1
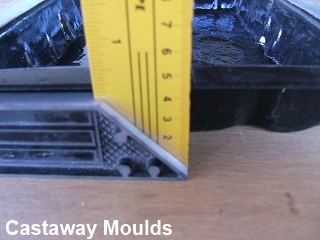
Measure the depth of your mould.
You now need to use timber the same size as the depth of your mould.
Step 2
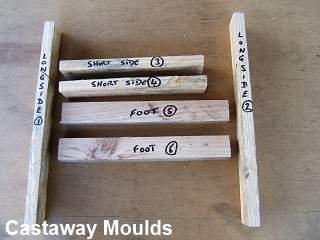
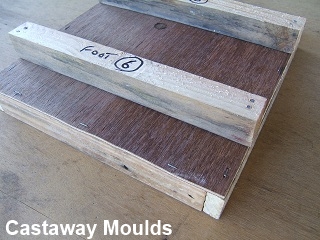
Mark out and cut your timber pieces dependant on the size of your mould. On a typical mould that is 300mm x 300mm you would need 7 pieces of timber:
- 2 for the long side.
- 2 for the short side
- 2 for the feet
- and 1 piece of plywood for the base.
 Step 3
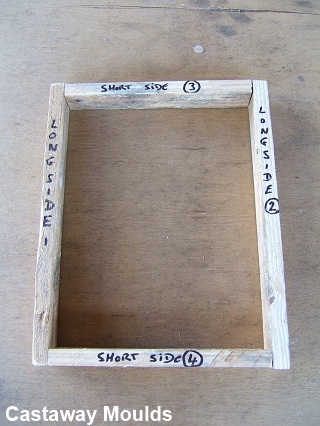
Nail your long pieces with the short pieces on the inside edge of the long pieces as per the photo.
 Step 4
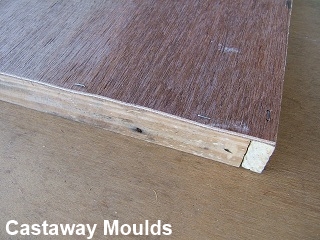
Now nail or staple your piece of ply wood on to the frame / carrier you have just made making sure you frame carrier is square.
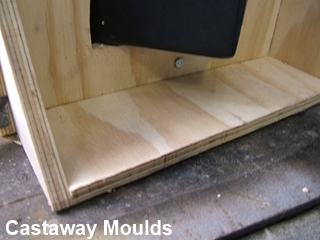
 Step 5
Now nail on the feet as per the photo.
 Step 6
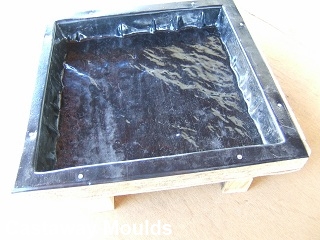
Your frame carrier should now look similar to this.
 Step 7
Add your mould to the frame carrier and nail or staple your mould to the frame carrier.
You may need to pre-drill Plastic and timber to avoid splitting.
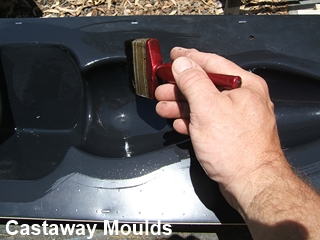
 Step 8
Your mould should now be coated with a release oil and turned upside down for 10 minutes to allow excess oil to be removed before being used.
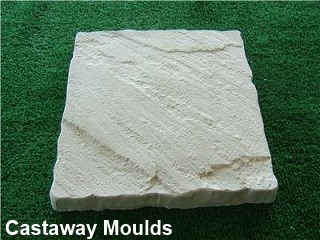
You are now ready to produce pavers or plaques for pleasure or profit.
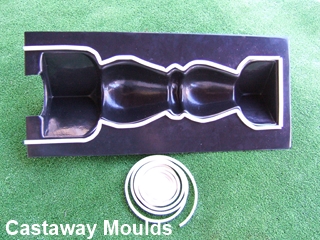
How to Frame a Balustrade Mould/Bird Bath Mould
For illustration purposes we have used a balustrade pillar mould. The same procedure is to be used for the bird bath pillar moulds.
 Step 1
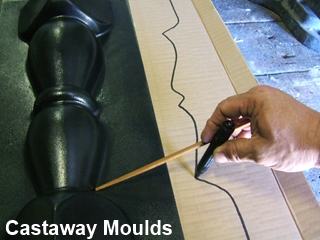
Our Balustrade Pillar Mould contains two halves, both sides need to be supported with a plywood frame or jacket.
You will first need to create a frame template, which needs to be transferred onto a piece of plywood and then cut (using a jigsaw/scroll saw).
A piece of plywood 600x900mm will be required approx 16mm in thickness.
 Step 2
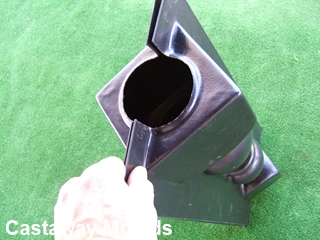
The Mould comes completely uncut, this means that the end user will need to cut their own holes, for filling and aligning the mould.
Cutting the hole out with a dremel-type tool is one of the easiest methods.
Fit the mould to the plywood by either gluing or stapling.
 Step 3
Attach a foam (window) seal around the inside of one half of the mould as shown.
PLEASE NOTE: The seal only needs to be applied to ONE of the two halves.
 Step 4
Fit the halves together, ensuring that the inside of the moulds line up equally. Then drill three 6mm locating holes through the moulds and frame at the top, middle and bottom.
This will ensure that your mould lines up perfect each and every time.
 Step 5
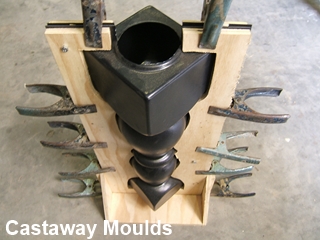
Brush the inside of your mould with a release oil. Refit the halves together with the use of the locating holes. Use 6mm bolts.
Secure the halves further, using clamps/clips as shown.
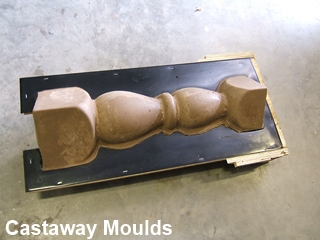
 Fully Prepared Mould
This particular mould uses approx one 10 litre bucket of concrete mix.
To Add strength to the balustrade, two pieces of reinforcing steel rod can be added when filling the mould.
 Demoulding
Once your pillar has dried out. Carefully lay down the mould, removing the clips and bolts.
Then gently pull one half away of the mould away, to expose the finished ornament.
Once the ornament has been removed from the mould, you will have two seams that need to be cleaned up.
This is usually done with a small angle grinder fitted with a concrete grinding disc.
The finished bird bath top should be attached to the bird bath pillar with a no nails type adhesive to stop it falling off in the wind.
Bird baths are best situated on or in a gravel type surface to prevent ornament from falling over.
